

Table of Contents
- What makes a waterproof sealant suitable for bathroom renovations
- Best silicone sealant for showers and wet areas
- How to apply bathroom sealant correctly
- Bathroom sealant curing time and drying conditions
- How to remove bathroom silicone before resealing
- Comparing sealant types for different bathroom surfaces
- Maintaining your bathroom sealant to prevent mould and deterioration
- Frequently Asked Questions
Last Updated: October 18, 2026
What makes a waterproof sealant suitable for bathroom renovations
A waterproof sealant bathroom product is a flexible, moisture-resistant compound designed to seal joints and gaps in wet areas, preventing water ingress and mould growth. The best sealants cure fully, resist mildew, and maintain flexibility without cracking as surfaces expand and contract. Ensuring these seals remain watertight is equally critical when installing moisture-resistant flooring materials to protect the structural integrity of the entire room.
When selecting a waterproof sealant for bathroom work, you're choosing between silicone, acrylic, and polyurethane options. Each performs differently depending on the surface, humidity level, and expected movement. At Trade Warehouse Direct, we stock a range of sealants suited to DIY and trade applications, making it straightforward to find the right product for your specific renovation challenge.
The key characteristics that separate effective bathroom sealants from poor performers are adhesion, flexibility, and antimicrobial resistance. A sealant that bonds poorly to tiles or grout will fail within months. One that hardens excessively will crack when tiles shift. The best products balance these qualities while resisting the fungal growth that thrives in bathroom moisture.
Best silicone sealant for showers and wet areas
Silicone stands as the preferred choice for shower enclosures and wet bathroom areas because it maintains flexibility indefinitely, resists moisture penetration, and doesn't degrade when exposed to constant spray and humidity. Unlike acrylic or polyurethane, silicone won't harden, crack, or allow water to seep behind tiles over time.
The best silicone sealant for showers contains antimicrobial additives that actively inhibit mould and mildew formation. Look for products specifically labelled for bathroom or wet-area use, these formulations include fungicide protection that standard silicones lack. Neutral-cure silicones work on most bathroom surfaces without causing staining, whereas acetoxy-cure variants can emit a vinegar smell during curing.
When applying silicone to shower areas, consider the substrate. Porous grout requires different application technique than glazed tiles. Silicone bonds strongly to both, but you need to ensure the joint is clean and dry before application. Trade Warehouse Direct supplies professional-grade silicone sealants that perform reliably across shower installations, whether you're sealing a corner joint or running a bead along the base of a bathtub.
Colour matters for aesthetics and maintenance. Clear silicone works universally but shows dirt and mould growth more visibly. White or grey silicone conceals staining better and suits most bathroom colour schemes. Matching your grout colour creates a seamless finish that hides age-related discolouration.
How to apply bathroom sealant correctly
Proper application determines whether your waterproof sealant for bathroom projects lasts five years or fifteen. The technique matters as much as the product choice itself.
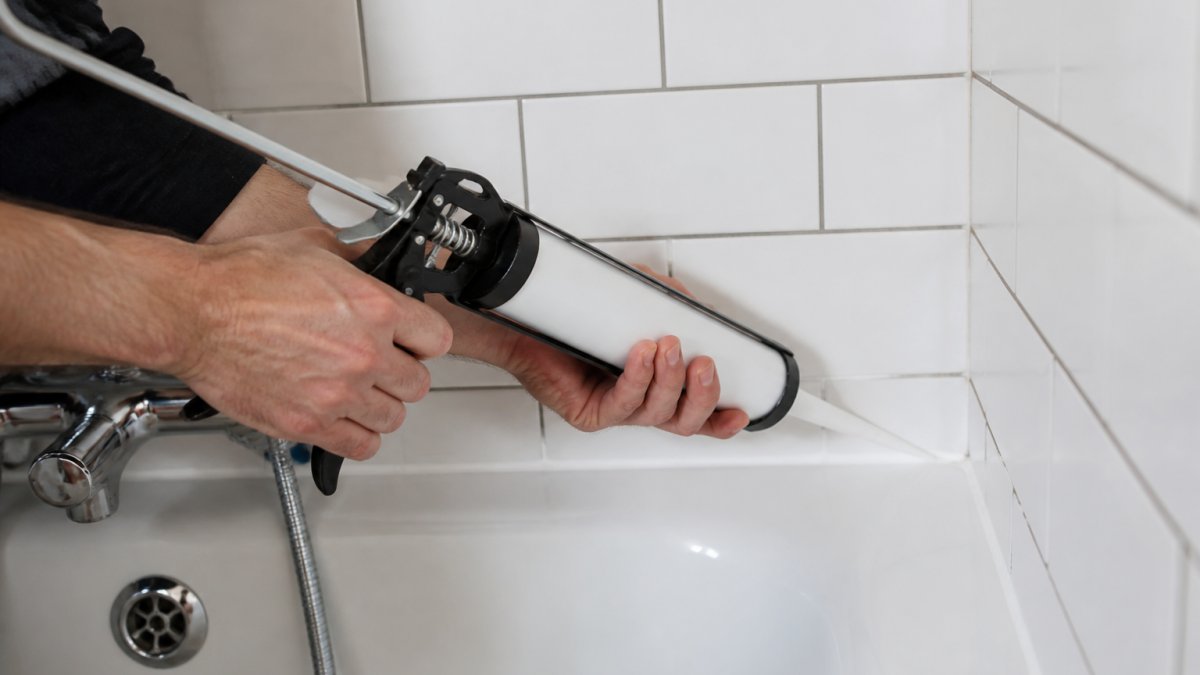
Start by cleaning the joint thoroughly. Use a grout brush or old toothbrush to remove loose debris, dust, and any residual old sealant. Wipe the joint with a damp cloth, then dry it completely with a lint-free rag. Moisture prevents proper adhesion, so patience at this stage pays dividends later.
Cut the sealant cartridge nozzle at a 45-degree angle, matching the joint width you're sealing. A narrow joint requires a thin cut; a wide corner joint needs a wider opening. Load the cartridge into a caulking gun and apply steady, even pressure as you move along the joint.
Smooth the bead immediately after application using a sealant smoothing tool or wet finger. This presses the sealant into the joint and creates a neat finish. Work quickly before the sealant begins to skin over.
Allow the sealant to cure fully before exposing it to water. Most silicone products require 24 to 48 hours, but check the manufacturer's guidance, curing time varies between products. Avoid using the shower or running water in the bathroom until curing is complete, or the sealant will fail prematurely.
Bathroom sealant curing time and drying conditions
The curing process differs from initial drying. A bathroom sealant may feel dry to the touch within hours, but true cure, the point at which it reaches full flexibility and water resistance, takes considerably longer.
Most silicone sealants require 24 to 48 hours to cure fully in standard conditions. Temperature and humidity significantly affect this timeline. Cold bathrooms cure more slowly than warm ones. High humidity speeds up cure in some silicone formulations but slows others. Check the product label for specific guidance, as different manufacturers use different chemistry.
During the curing window, avoid running the shower, splashing water, or creating steam in the bathroom. Premature water exposure compromises the seal and can cause permanent failure. If you must use the bathroom during curing, keep the shower door closed and avoid direct spray on newly sealed areas.
Ventilation matters more than most DIYers realise. Bathrooms with extraction fans or open windows cure sealant faster than sealed, humid spaces. Run your extraction fan continuously during and for several hours after application. This removes moisture-laden air and promotes consistent, reliable curing.
Temperature below 5°C significantly slows or halts curing in most products. If you're renovating during winter or in a cold climate, allow extra time and ensure the bathroom remains reasonably warm. Some advanced formulations cure faster in cold conditions, so products from Trade Warehouse Direct may offer advantages in challenging seasonal conditions.
How to remove bathroom silicone before resealing
Removing old silicone sealant correctly prevents damage to tiles, grout, and substrate surfaces. Poor removal technique leaves residue that prevents new sealant adhesion, virtually guaranteeing failure of your next application.
Begin by softening the old sealant. Apply a silicone remover or acetone-based product along the bead and let it soak for 15 to 30 minutes. This breaks down the adhesive bond and makes removal easier. Some professionals use a heat gun on low setting to warm the sealant slightly, which also aids removal.
Use a plastic or silicone sealant removal tool rather than a metal blade. Metal can scratch or chip tiles and grout. Work the tool under the sealant bead and gently prise it away from the joint. Move slowly and steadily to avoid gouging the substrate. For stubborn sections, apply more remover and wait longer before attempting removal.
Once the bulk of the sealant is removed, clean the joint thoroughly. Wipe away residue with a cloth dampened in the remover product. Use a grout brush to scrub any remaining fragments. Finally, wash the joint with warm soapy water and dry completely before applying new sealant.
Don't skip this step or rush through it. Thorough removal is what separates professional-quality bathroom renovations from DIY projects that fail prematurely. Trade Warehouse Direct stocks silicone removers and specialist tools that make this task faster and more effective than improvised alternatives.
Comparing sealant types for different bathroom surfaces
Different bathroom surfaces require different sealant formulations. Glazed tiles, natural stone, grout, and acrylic tubs each have specific compatibility requirements.
| Surface Type | Best Sealant | Key Reason | Curing Time |
|---|---|---|---|
| Glazed ceramic tiles | Neutral-cure silicone | Won't stain porous grout; bonds to smooth tile | 24-48 hours |
| Natural stone (marble, granite) | Acetoxy-cure silicone | Compatible with stone; won't discolour | 24-48 hours |
| Grout joints | Silicone with fungicide | Resists mould; maintains flexibility | 24-48 hours |
| Acrylic bathtub edges | Silicone or polyurethane | Silicone preferred; more flexible movement | 24-48 hours |
| Fibreglass shower base | Polyurethane sealant | Superior adhesion to curved surfaces | 48-72 hours |
Glazed ceramic tiles represent the most common bathroom surface. Neutral-cure silicone is the standard choice because it won't yellow or stain the grout. The smooth tile surface bonds well to silicone, and the flexibility accommodates minor tile movement without cracking.
Natural stone requires careful sealant selection. Marble and granite are porous and can stain if exposed to acetoxy-cure silicone. Neutral-cure formulations are safer, though you should always test on an inconspicuous area first. Acetoxy-cure silicone can discolour light-coloured stone permanently.
Grout joints in wet areas benefit from antimicrobial-enhanced silicone. Standard sealants work, but those with built-in mould inhibitors prevent fungal growth that thrives in bathroom humidity. The difference becomes apparent within months, treated joints stay clean whilst untreated ones develop black speckling.
Acrylic bathtub edges can accept either silicone or polyurethane. Silicone remains flexible as the tub expands and contracts with temperature changes, making it the preferred option. Polyurethane offers superior adhesion in some cases but hardens more, which can cause cracking if the tub moves significantly.
Maintaining your bathroom sealant to prevent mould and deterioration
A waterproof sealant bathroom product requires minimal maintenance, but deliberate care extends its lifespan significantly. Mould prevention and moisture management are the keys to longevity.
Clean your bathroom sealant monthly using a soft brush and warm soapy water. This removes soap residue, body oils, and mineral deposits that accumulate on the surface. Avoid abrasive scrubbers or bleach-based cleaners, which can degrade the silicone over time.
Ventilation is your primary mould prevention tool. Run your extraction fan during and for at least 30 minutes after every shower. This removes moisture that would otherwise condense on sealant surfaces and create ideal conditions for fungal growth. Open windows if you lack mechanical ventilation.
Inspect your sealant quarterly for signs of deterioration. Look for discolouration, gaps, or areas where the sealant has pulled away from the joint. Early detection allows you to address problems before they compromise the waterproof seal.
If mould appears despite preventive measures, clean it with a dilute vinegar solution or a specialist mould remover designed for silicone. Avoid bleach, which can degrade the sealant. Persistent mould suggests inadequate ventilation rather than sealant failure, address the underlying moisture issue to prevent recurrence.
Most bathroom sealants last 5 to 10 years with proper maintenance. When failure does occur, complete removal and replacement is the correct approach. Attempting to patch or re-seal over degraded material rarely succeeds.
Bathroom renovations succeed or fail based on sealant quality and application technique. Water damage from failed sealants costs far more to repair than investing in professional-grade products from the start.
Frequently Asked Questions
What is the best waterproof sealant for a bathroom renovation?
The best choice depends on where you're sealing. Silicone sealants work well for most bathroom applications because they're waterproof, flexible, and resist mould. Hybrid sealants offer better adhesion to mixed materials like tiles and acrylic. Polyurethane sealants provide superior durability but require more careful application. For showers and wet areas, 100% silicone is typically preferred. Check the product label to confirm it's rated for wet environments and has mould-resistant properties.
How long does bathroom sealant take to cure before it gets wet?
Most silicone sealants cure to the touch within 30 minutes to 1 hour, but full water resistance typically takes 24-48 hours. Hybrid sealants often cure faster, sometimes within 3-6 hours. Always check the manufacturer's instructions on your specific product, as curing times vary based on temperature, humidity, and sealant thickness. Don't expose the sealed area to water until the full cure time has passed, or moisture can become trapped underneath.
How do I remove old bathroom sealant before resealing?
Use a sealant removal tool or a sharp Stanley knife to cut along the edge of the old sealant and carefully peel it away. For stubborn sealant, apply a commercial sealant remover and let it sit for the time specified on the product. Once the old sealant is removed, clean the joint thoroughly with a damp cloth and allow it to dry completely. Remove any remaining residue with methylated spirits on a cloth. A clean, dry surface is essential for the new sealant to bond properly.
Can I apply waterproof sealant over existing sealant?
It's not recommended. New sealant won't adhere properly to old sealant, and moisture can become trapped between layers, leading to mould and failure. Remove the old sealant completely first, clean the joint thoroughly, and allow it to dry. If you're sealing over painted surfaces, ensure the paint is sound and not peeling. Proper preparation, removing old material, cleaning, and drying, ensures your new waterproof sealant for bathroom renovations will last and perform as intended.
