
Last Updated: 30 October 2026
Quick Summary
Choose reliable fixings for solar panel installation by matching stainless steel grade to the site: A2 (304) suits most inland roofs while coastal sites need A4 (316) marine-grade. Anchor every hook into a rafter, follow the manufacturer's span table and torque figures, and flash every penetration.
- Use A4 (316) marine-grade stainless on coastal installations because salt spray attacks 304 far faster.
- Anchor roof hooks into rafters or structural members, never into tile battens or roof sheeting alone.
- Tighten bolts to the manufacturer's stated torque with a calibrated wrench, then paint-mark each head for later inspection.
- Fix corrugated and trapezoidal metal roofs through the crest into a purlin, never into the sheet alone.
- Tighter fixing spacing is typically needed at roof edges, corners and ridges where wind uplift rises sharply.
Table of Contents
- Solar Panel Mounting Fasteners: The Core of a Secure Installation
- Solar Panel Mounting Brackets: Matching Hardware to Your Roof Type
- Solar Panel Roof Hooks: Choosing Attachment Points That Hold
- Corrosion-Resistant Solar Fixings: Materials, Coatings and Galvanic Compatibility
- Rails, Rail Splices, Mid Clamps and End Clamps: Assembling the Support Structure
- Structural Loading and Wind Uplift: What Your Fixings Must Resist
- Installation Sequence and Inspection Checklist
- Ordering Solar Fixings with Trade Warehouse Direct
- Frequently Asked Questions
Solar Panel Mounting Fasteners: The Core of a Secure Installation
Reliable fixings for solar panel installation are the difference between an array that outlasts its warranty and one that works loose in the first big storm. Installers and DIY buyers often spend hours on panel selection and little time on the bolts holding them down.
Solar panel mounting fasteners are the bolts, nuts, washers and anchors that clamp panels to rails and rails to the roof structure. They carry every load the array faces: dead weight, wind uplift, thermal movement and vibration over decades of weather exposure.
Bolts, Nuts and Washers: Sizing and Grades That Matter
Stainless steel is the default for solar work, and grade A2 (304) suits most inland sites. Coastal installations need A4 (316) marine-grade stainless because salt spray attacks 304 far faster.
Washers do more than spread load. For a deeper look, this explainer covers the types of washers and their benefits.
Watch out: mixing stainless bolts with galvanised brackets in a wet coastal environment invites galvanic corrosion at the joint, and the bolt usually loses.
Torque Specifications and Installation Checks
Torque is where good hardware goes wrong. Under-tighten and the joint works loose under wind vibration. Over-tighten and you crush the aluminium rail or strip the thread. Always follow the rail or bracket maker's stated torque figure, and use a calibrated torque wrench rather than feel.
A simple check after assembly: mark each tightened bolt head with a paint pen, then inspect after the first month and again after the first storm season. Any mark that has shifted means movement.
Solar Panel Mounting Brackets: Matching Hardware to Your Roof Type
The right bracket depends entirely on the roof. There is no universal solar panel mounting bracket, and choosing one that fights the roof surface is the most common source of leaks and callbacks. The practical question is not "which bracket is best?" but "which bracket suits this roof covering, this substructure and this exposure?"
Pitched Roofs, Flat Roofs and Coplanar Installations
Pitched roofs typically use roof hooks or L-brackets fixed directly to rafters, with the panel sitting parallel to the roof in a coplanar installation. Flat roofs need tilted frames or ballasted systems that raise the panels to the correct angle and manage wind uplift differently.
| Roof Type | Typical Fixing Approach | Key Consideration |
|---|---|---|
| Pitched tile roof | Roof hooks to rafters | Replacing tiles and flashing correctly |
| Pitched slate roof | Slate hooks or strap fixings | Brittle covering, avoid point loading |
| Pitched metal roof | Brackets with sealing washers | Screw penetration and gasket compression |
| Flat roof | Tilted frame or ballast | Wind uplift and added weight |
| Corrugated roof | Top-hat or bracket mounts | Fixing to purlins, not just sheet |
Matching the Fixing to the Roof Covering
Slate roofs are the least forgiving.
Tile roofs, whether concrete, clay or interlocking, accept roof hooks that replace a tile and sit on a flashed bracket.
Metal roofs, standing seam, corrugated and trapezoidal, behave differently again. Corrosion resistance remains a critical factor when selecting metal fasteners for these installations, as galvanic reactions between dissimilar materials can compromise the structural integrity of the entire array.
Flat roofs fall into two families: mechanically fixed tilted frames, which penetrate the membrane and must be flashed and sealed, and ballasted systems, which rely on weight and therefore on the roof's load capacity. Ballast is not a shortcut; the roof structure must be assessed for the added dead load, and the array must be laid out to manage wind uplift at edges and corners.
If the roof structure is unknown, undersized, or the covering is fragile or of heritage value, stop and get a structural or roofing assessment. A bracket that is right for the covering but wrong for the structure is still a failure waiting to happen.
Waterproofing and Preventing Roof Leaks
Every penetration through a roof covering is a future leak if it is sealed badly.
For metal roofs, screws with a compressed EPDM sealing washer are standard, but the washer only seals if it is compressed correctly. Guidance on choosing the right roofing screw size helps avoid leak-prone penetrations.
A useful rule of thumb: the flashing should always overlap the fixing in the direction of water flow, and the sealant is a backup, not the primary barrier.
Solar Panel Roof Hooks: Choosing Attachment Points That Hold
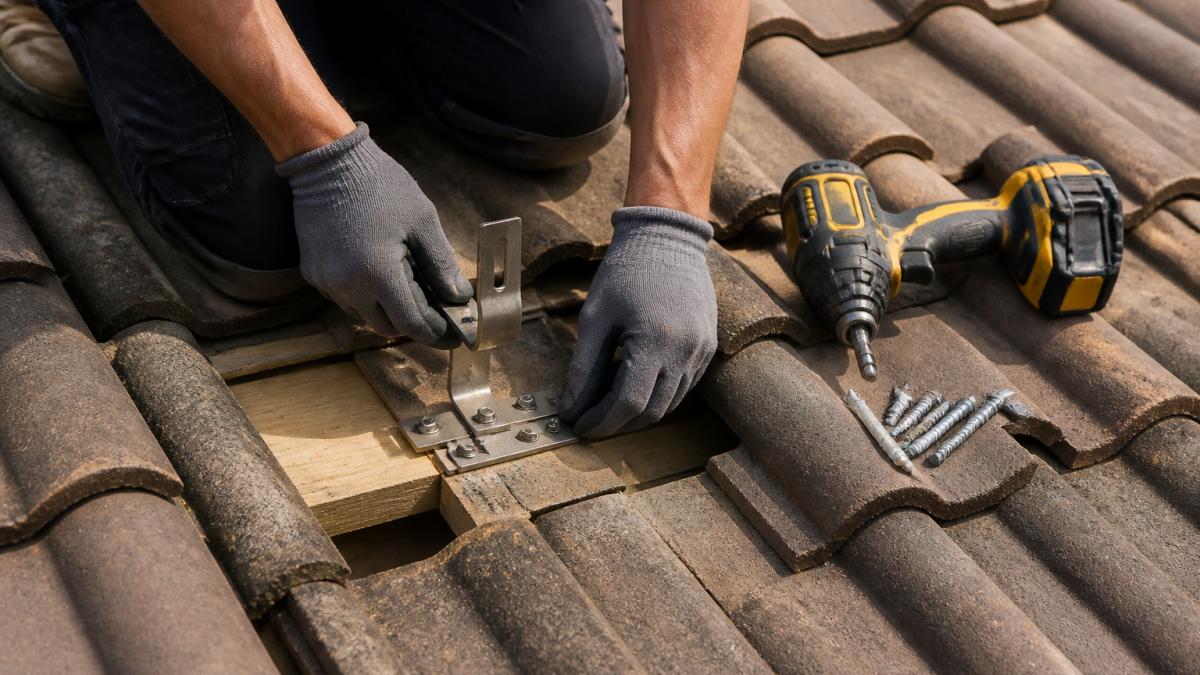
Solar panel roof hooks are the load-bearing link between the array and the building. Each hook must anchor into a rafter or structural member, never into tile battens or roof sheeting alone. For the fixing detail itself, this guide to roofing screws covers everything you need to know.
What a Roof Hook Actually Carries
A roof hook is not just holding the panel down, it is resisting several loads at once. Dead load pulls down. Wind uplift pulls up, and uplift is usually the larger force on a roof-mounted array. Thermal cycling and vibration work the joint loose over years.
Uplift is not uniform across the roof. It rises sharply at edges, corners and ridges, so fixing spacing in those zones is typically tighter than mid-roof. A layout that is adequate in the middle of a large roof can be under-fixed at the perimeter.
Deriving Spacing from Wind Region and Array Layout
Spacing is not a universal number; it comes from the rail manufacturer's span table for your wind region, panel size and rail profile. The National Construction Code sets the structural framework, and wind loading is calculated per the AS/NZS 1170.2 wind actions standard.
Three variables drive the spacing you actually use:
- Wind region and terrain category: coastal and exposed sites carry higher uplift than sheltered inland sites.
- Array position on the roof: edge and corner zones need tighter spacing than the field.
- Panel size and rail span: longer panels and wider rail spans increase the load per hook.
Deviating from the span table to save fixings is how arrays fail inspection or, worse, fail in service. If the table does not cover your situation, ask the manufacturer rather than interpolating.
Finding and Verifying the Rafter
A common mistake is anchoring to the nearest timber without checking it is a rafter. Probe or use a stud finder, and if the rafter is undersized or damaged, add a noggin or relocate the hook.
Verification matters as much as location. Check that the fixing has the embedment the manufacturer specifies, that the timber is sound and not rotted, and that the hook sits flat without packing that could crush or slip. A hook that is correctly placed but poorly seated will still move under load.
Treat the span table as the minimum, not the target. On exposed sites or at roof edges, the safe layout is usually the tighter one, and the cost difference in a handful of hooks is trivial against a callback or a failure.
Corrosion-Resistant Solar Fixings: Materials, Coatings and Galvanic Compatibility
Corrosion-resistant solar fixings are non-negotiable in a coastal or humid climate, and the material pairing matters as much as the material itself. When two dissimilar metals meet in the presence of moisture, the less noble one corrodes first.
The Australian Standard for atmospheric corrosivity categorisation, AS 4312, maps coastal and industrial zones by corrosion rate, which is the practical way to decide between 304 and 316 stainless.
Rails, Rail Splices, Mid Clamps and End Clamps: Assembling the Support Structure
The rail and clamp assembly is a system, and mixing components across manufacturers is where secure assembly quietly fails. Mid clamps hold adjacent panels to the rail; end clamps close the array at each edge. Rail splices join lengths of rail and must sit over a support, never floating mid-span.
- Mid clamps: sized to the panel frame thickness, tightened to spec
- End clamps: often a different profile to mid clamps, do not substitute
- Rail splices: aligned over a bracket, with the correct internal joiner
- Panel alignment: check rails are parallel before clamping, not after
Panel alignment matters more than it looks. If rails are out of parallel, mid clamps load unevenly and frames can distort. Set out rail spacing with a string line before you fix anything down.
Structural Loading and Wind Uplift: What Your Fixings Must Resist
Wind uplift is the load that pulls arrays off roofs, and it is the one most often underestimated. Uplift forces rise sharply at roof edges and corners, so fixing spacing there is usually tighter than mid-roof.
The National Construction Code sets the structural framework, and wind loading is calculated per the AS/NZS 1170.2 wind actions standard. In practice, this means the rail manufacturer's span tables and fixing spacing are not suggestions; they are derived from those loads for your wind region.
Installation Sequence and Inspection Checklist
A repeatable sequence keeps quality consistent across every job. Set out the array, fix the roof attachments and flash them, mount rails, then clamp panels. Inspect before you leave the roof, not after.
- Rafters located and marked before drilling
- Every penetration flashed and sealed
- Hook and bracket spacing matches the span table
- Bolts torqued to spec with a calibrated wrench
- Washers present under every bolt head
- Stainless grade correct for the site's corrosivity zone
- Rails parallel and splices supported
- Mid and end clamps correct profile and tight
- Paint-pen marks applied for future inspection
Ordering Solar Fixings with Trade Warehouse Direct
Sourcing consistent, correctly graded fixings in the quantities a job needs is half the battle. Trade Warehouse Direct offers a Price Match Guarantee, nationwide delivery, and free standard shipping over $150. For current prices and stock on solar fixings, check the Trade Warehouse Direct website or request a quote. Before ordering, it also helps to read this guide on buying safety-critical fixings online.
Frequently Asked Questions
What fixings are used to install solar panels?
A typical installation uses roof hooks or brackets anchored to rafters, aluminium rails with rail splices, mid clamps and end clamps to hold the panels, and stainless steel bolts, nuts and washers to fasten everything together. Flashing kits seal the roof penetrations. The exact combination depends on your roof type and mounting system, so check the manufacturer's compatibility list before ordering.
Do solar panel fixings need to be corrosion-resistant?
Yes. Fixings sit on the roof exposed to rain, salt air and temperature swings for decades, and a corroded bolt can fail long before the panel does. Specify stainless steel fasteners, ideally grade 304 or 316, and aluminium mounting components, and keep dissimilar metals separated to avoid galvanic corrosion. Corrosion-resistant solar fixings cost a little more upfront but protect both the array and the roof structure.
Can the wrong fixings damage a roof or solar panel system?
They can. Undersized or low-grade bolts can work loose under wind uplift, and incorrect roof hooks can crack tiles or leave penetrations unsealed, causing leaks. Mixing galvanised and stainless components accelerates corrosion. Always match fixings to the mounting system's specifications, use flashing on every penetration, and check torque values during installation. If in doubt, consult a licenced installer or your supplier's technical team.
Getting the fixings right is the part of a solar job nobody photographs and everybody relies on. Trade Warehouse Direct stocks the fasteners, brackets and mounting hardware that hold an array together, backed by a Price Match Guarantee, nationwide delivery and free standard shipping over $150. Get started with Trade Warehouse Direct and specify your next installation with fixings you can trust.


